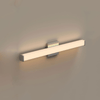
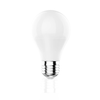
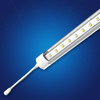
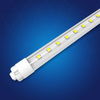
A home garage, or any other workshop, you need the same category of light everywhere.
The chances are that most of the lights in your garage or workshop are fluorescent lights. These days LED fixtures t light many garages, and they do it better than fluorescent lights. LEDs are famous for quite a few reasons-
- LEDs render better colors, almost like daylight, and come in different color temperatures.
- LED lights are energy-efficient and cost-effective, so save a lot of money in the long run.
- No warmup time and instant switch-on
- Attains full brightness immediately
How Many Lumens Do You Need?
According to the IESNA Lighting Handbook, a garage needs around 80 lumens-100 lumens/sq feet.
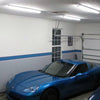
If we consider One car garage area typically has a size of 12 feet wide and 22 feet deep, which is 264 square feet.
So the possible number of lumens required for an area this wide according to the recommended range above= 264*100=26400 lumens.
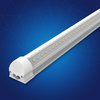
Four T8 8ft V Shape LED Tube (2 rows of 2 8ft V Shape LED Tube arranged in parallel can be a great option) are enough to light up a one-car garage.
Note= The maximum distance between two lighting fixtures is 1.5 times the height of the work/task surface.
Which Type Of Light Do You Need?
Hardwired, plug and play, suspended mount, or wall mount, which one do you require?
A hard-wired light needs to connect to the power source directly, so you can not move them anywhere. This is costly, as it also requires some expertise, as it needs rewiring and reconnections.
You just need to connect the plug and play fixture to the power source, and it will switch on instantly. This option seems attractive for its cost-effectiveness and has a simple installation. This might look good on the surface, but in the long run, it is not a viable option.
Do You Have Enough Outlets?
If you have an existing number of outlets, check whether it will be enough for the new fixtures. Just make sure that you have the power outlet close to the light, otherwise, you will need a power cord.
Task Lighting, Ambient Lighting, Or Accent Lighting?
Ambient lighting is just for the sake of navigating things with ease.
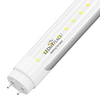
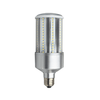
Ambient lighting fixtures are generally the lights that fit on ceilings. LED panels, LED tubes and bulbs are good enough ambient lighting. For walls, doors, and ceilings, you need these lights.
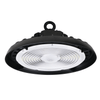
Task lighting fixtures include LED downlights in case one has finished ceilings. LED high bay lights are a good option for storage spaces. This is good for workspaces and repair shops.
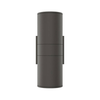
For accent lighting, suspended lights are the best. Wall mount lights can also be some good options, with LED bulbs.
Color Temperature
The best color temperature preferred in the garages and workshops is in the range of 4000 kelvins-5000 kelvins.
Surface Mount Or Suspension Mount?

As discussed above, the surface mount is good for ambient lighting only.
Once you have mapped out the specific types of lights you need, you are good to go with installation. There are lights that you can mount on the ceilings or have hunged with hooks.
If woodwork or car repairing is the most you do in the workshop, you would like to avoid shadows, dark spots, or light spills. For this case, hanging or suspended ceiling lights are the best. Most of these lights come with hooks through which the lights can hang via chains.
Note- Just make sure that the suspended lights are fastened safely and tightly for safety precautions.
For Ceiling Mounted fixtures

Better hire an electrician you had not planned on the layout yet. It gets quite complicated with wall mount, as it involves connecting junction boxes, PVCs, and a lot of other stuff.
Layout for Suspended Mount

Hammer the nails into the wooden joists of the ceilings, up to 1 inch deep. Two nails should be placed at lengths equal to the distance between the suspension slots of the LED fixture.
Keep in mind that connectors also have to connect between two successive fixtures, so leave a gap equal to the length of the connector plus a margin of 2 inches.
ASSEMBLE LED SHOP LIGHTS (Hanging or suspended mount)
Most of the lights come pre-assembled these days. They are power inlets at each end of the light. Connect the power cord to the power terminal for power input.
If you are planning out a daisy chain, just insert the linking cable into the other end of the light.
Each light comes with two slots at the end, for hook insertions. The hook is attached to one end of the suspension chain. All you need to do is to insert the hook into the slots.
Final Step
Now hang the lights and make sure that your first light should be close to the power source. One by one, connect the other light with the previous one with the connector.
Keep doing this until a daisy chain is formed.
Now Enjoy Your New Lighting
Switch on the power and enjoy the brightness of your all-new lighting arrangement.

