
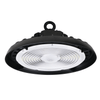


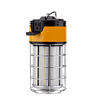


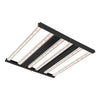


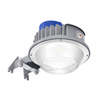


Teasers of UFO High Bay light
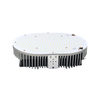
A UFO LED high bay light is designed like a UFO Disc. This Disc-shaped LED luminaire system is featured with an important flat aluminum guard with optics that are precisely configured to optimize the distribution of light around a given area without making dependency on any bulky reflectors.
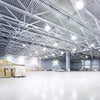
Generally, this high bay light usage depends upon its ceiling height, angle of installation, power of lighting fixture, and luminous flux. It must be installed in the areas where the height of the ceiling is 15ft or more. For example, if you mount this Warehouse light of 100W on the ceiling height less than 15ft, you will not be comfortable with the emitted lighting as it will be overpowering because of excessive brightness.
How to Hang UFO High Bay Light?
There are three ways to install these lighting, and each depends upon the types of its mounting as this UFO High Bay Lights are available with three mounts i.e.
- Hook Mount
- Ceiling Mount
- ½" NPT Mount
Now let's focus on the steps of installation for all these mounts:

Here I am starting with,
- Hook Mount
# Step:1
Turning off the power
Make sure that power is turned off before starting the procedure of installation. Any negligence can be a threat as you can get hit by an electric shock if you will not turn off the power.
# Step:2
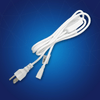
Wiring
Now connect the wire attached with the light to ac power. Connect the black coloured wire with a live wire, the white one with the neutral line, and the green with ground wire. If you want to avoid risk, make sure that you have not mixed the wire.
# Step:3
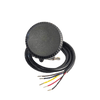
Screwing the Lifting Ring
If the ceiling of your space is ready for mounting or if the hook is already mounted, then you can directly hook the UFO high bay light with the hook. But if the ceiling is not ready to hook or the hook is not mounted, drill a hole to mount the hook. You will find a lifting ring or a hook hanger with a fixture. Screw that lifting ring on the top of the High Bay LED Light fixture, and then tighten the screws firmly.
# Step:4
Drooping the UFO High Bay Light
Droop the UFO High Bay light on the ceiling-mounted hook with the help of a lifting ring.
# Step:5
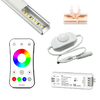
Want to connect the dimmer?
If the UFO LED High Bay Light purchased by you is featured with a dimming facility, you will find two extra wires to connect the dimmer. With the help of a dimmer, you will adjust the amount of light as per requirement. The different colour of the wires represents DIM+ and DIM- adjustment. Please check the lamp level for being confirmed which wire represents what adjustment?
And if you do not have the requirement of dimming feature, then there is no need to use both of those wires.
# Step: 6
Now time to turn on the power
Once connecting it to the switch, the lighting fixture is ready for use. Just turn on the power and enjoy the perfect illumination.
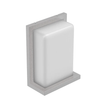
- Ceiling Mount

Lights can also get mounted on the ceiling by making usage of a U-shaped bracket. If you compare this ceiling mount with the aforementioned hook mount, you will find the difference that you need to prepare your own U-shaped bracket for mounting this fixture on the roof. This type of frame can also be used for adjusting the angles. I prefer this mounting method only if you are precise about the angle of lighting.
# Step:1
Turn off the power
Repeating the same step, you need to turn off the power first. No operation should get started if the power switch is on.
#Step:2
Wire connection
The same method is required for the connection as above. Need to connect with the AC power with the live, ground wire, and neutral line.
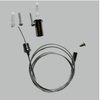
# Step:3
Mount the U-shaped bracket
The U-shaped bracket should be mounted on both sides of the UFO LED high bay light with the help of screws, and be assured that the light could get hung along with the frame.
# Step:4
How to droop the U-shaped bracket on the ceiling or wall?
Use chalk or a sharp tool to mark on the top of the ceiling or wall. Now measure the distance between the two holes and drill tiny holes on the wall's marked point using a driller. The hole should be of the same diameter according to the plastic expansion tube. Keep the hammer handy with you so that you can hit on the expansion tube for fixing the screws tightly through a U-shaped bracket for protecting the bracket on the ceiling or wall. Once after getting done with this step, only the lighting fixture can get suspended.
# Step:5
Dimmer Connection
If required, then only connect the wires on the light with dimmer.
#Step:6
Angle adjustment and turning on the power
By using a U-shaped bracket, you can adjust the angle of the light. Finally, connect the switch and turn on the power.
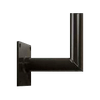
- ½" NPT Mount

For mounting the UFO High Bay Light, you can use ½" NPT. In this mounting, there is the requirement of a steel pipe and brackets. Using these both things, you can mount the light.
# Step:1
Unscrewing and making corresponding holes
Secure the bracket on the light and then unscrew the ½" NPT nut and make the corresponding holes on the bracket through the ½" NPT.
# Step:2
Tightening of the screws
Connect the steel pipe and bracket and tighten that unscrew nut.
# Step:3
Suspending process and the final one
Now you can suspend the steel pipe up, and for the lighting result, you can follow the same steps mentioned above to connect the light to AC power.
Please choose any of them as per your preference, and all of these installation methods are applicable for the UFO LED High Bay lights offered by LEDMyplace.
I hope this blog will help you if you are looking for an assisting guide for installing UFO LED High Bay Lights. If you have any more queries, doubts, or suggestions, please let us know by dropping an e-mail at info@ledmyplace.com. We will be more than happy and will love to write a blog based on your query.