

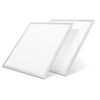

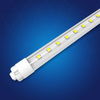


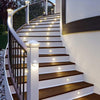
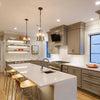


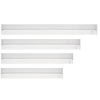


Installing LED panel lights can be a great way to enhance the lighting in your space while reducing energy consumption. Whether you're a professional electrician or a DIY enthusiast, having the right tools for the job is essential. In this article, we will discuss the tools needed for installing LED panel lights and provide you with a step-by-step guide to ensure a successful installation.
Table of Contents
- Introduction
- Tools for LED Panel Light Installation
- Step 1: Safety Precautions
- Step 2: Measuring and Marking
- Step 3: Cutting Openings
- Step 4: Wiring and Connections
- Step 5: Mounting the LED Panel Light
- Step 6: Testing and Finalizing
- Conclusion
- FAQs
1. Introduction
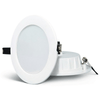
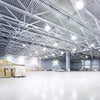
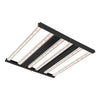
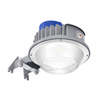
LED panel lights have gained popularity in residential and commercial settings due to their energy efficiency and sleek design. Proper installation is crucial to achieve optimal performance and longevity of these lights. Let's explore the essential tools required for a successful LED panel light installation.
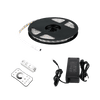
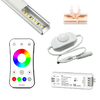
2. Tools for LED Panel Light Installation
Before starting the installation process, gather the following tools:
- Measuring Tape
A measuring tape is essential for accurately measuring the dimensions of the installation area. This will help ensure that the LED panel light fits perfectly and is aligned properly.
- Pencil or Marker
Use a pencil or marker to mark the positions for cutting openings and mounting the LED panel light. These markings will act as a guide during the installation process.
- Screwdriver Set
A screwdriver set with various sizes and types of screwdrivers is necessary for removing existing fixtures, attaching brackets, and securing the LED panel light in place.
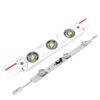
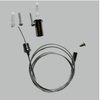
- Wire Strippers
Wire strippers are used to remove the insulation from electrical wires, allowing for proper electrical connections during the installation process.
- Wire Connectors
Wire connectors are required to join the electrical wires securely. Choose connectors that are compatible with the wire gauge and provide a reliable connection.
- Drill
A drill with the appropriate drill bits is necessary for creating openings in the ceiling or wall for mounting the LED panel light. Make sure to select the correct drill bit size for the type of fixture and material you are working with.
- Level
A level ensures that the LED panel light is installed horizontally or vertically straight. This is important for achieving a professional-looking installation.
- Voltage Tester
A voltage tester helps determine if the power supply to the installation area is turned off, ensuring your safety during the installation process.
- Ladder or Step Stool
Depending on the height of the installation area, a ladder or step stool may be needed to reach and install the LED panel light safely.
3. Step 1: Safety Precautions
Before starting the installation, always prioritize safety. Turn off the power supply to the area where you will be working and use a voltage tester to verify that there is no electrical current. Ensure that you are wearing appropriate safety gear, such as gloves and safety glasses, to protect yourself from any potential hazards.
4. Step 2: Measuring and Marking
Using a measuring tape, carefully measure the dimensions of the installation area. Mark the positions for cutting openings and mounting the LED panel light using a pencil or marker. Double-check your measurements to ensure accuracy.
5. Step 3: Cutting Openings
If necessary, use a drill with the appropriate drill bit to create openings in the ceiling or wall for mounting the LED panel light. Follow the marked positions and be mindful of any electrical wires or pipes that may be present.
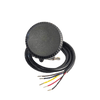
6. Step 4: Wiring and Connections
Carefully follow the manufacturer's instructions for wiring the LED panel light. Use wire strippers to remove the insulation from the electrical wires and connect them securely using wire connectors. Take note of the polarity and ensure that the connections are tight and secure.
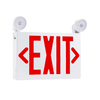
7. Step 5: Mounting the LED Panel Light
Attach the brackets or mounting clips provided with the LED panel light to the ceiling or wall. Carefully position the light fixture and secure it in place using screws and a screwdriver. Use a level to ensure the LED panel light is properly aligned.
8. Step 6: Testing and Finalizing
After mounting the LED panel light, turn on the power supply and test the light to ensure it is functioning correctly. Make any necessary adjustments or tighten any loose connections. Once you are satisfied with the installation, finalize it by securely fastening all screws and covering any exposed wires.

9. Conclusion
Installing LED panel lights can transform the ambiance of any space while offering energy-efficient lighting. By following the step-by-step guide provided in this article and using the appropriate tools, you can ensure a successful and professional installation. Enjoy the benefits of LED panel lights and the enhanced lighting experience they provide.
10. FAQs
Q1: Can I install LED panel lights myself, or should I hire a professional? A1: LED panel lights can be installed by DIY enthusiasts, but it's important to have a basic understanding of electrical wiring and follow safety guidelines. If you're unsure, it's recommended to consult a professional electrician.
Q2: Are LED panel lights compatible with dimmer switches? A2: Yes, many LED panel lights are compatible with dimmer switches. However, it's essential to check the product specifications to ensure compatibility before installing them with a dimmer switch.
Q3: How long do LED panel lights last? A3: LED panel lights have a long lifespan, typically ranging from 50,000 to 100,000 hours. This translates to several years of usage, depending on the number of hours they are in operation each day.
Q4: Can LED panel lights be used in wet locations, such as bathrooms? A4: LED panel lights designed for damp or wet locations are suitable for use in bathrooms. These lights are built to withstand moisture and provide safe and reliable illumination in such environments.
Q5: Do LED panel lights require regular maintenance? A5: LED panel lights are low-maintenance compared to traditional lighting fixtures. However, periodic cleaning of the light surface and ensuring proper ventilation around the fixture can help maintain optimal performance.


1 comment
Great staff here!