


In today's world, energy-efficient lighting is not only a smart choice but also an eco-friendly one. High bay LED lights have become increasingly popular in both commercial and industrial settings due to their energy-saving capabilities and long lifespan. If you're wondering how to hang high bay LED lights, you've come to the right place. In this comprehensive guide, we'll walk you through the process step by step, ensuring that your installation is safe, efficient, and hassle-free.
Table of Contents
- Introduction
- Understanding High Bay LED Lights
-
Safety Precautions
- Safety Gear
- Turning off Power
- Choosing the Right Location
-
Installing Mounting Hardware
- Ceiling Mount
- Chain Mount
-
Wiring the High Bay LED Lights
- Power Source
- Wiring Connections
- Hanging the Fixtures
- Testing and Adjusting
- Maintenance Tips
- Energy Efficiency and Cost Savings
- Frequently Asked Questions (FAQs)
- Conclusion
1. Introduction
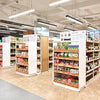
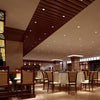
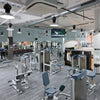
High bay LED lights are a great investment for any space that requires bright, consistent lighting. Whether you need them for a warehouse, gymnasium, or retail store, proper installation is crucial to ensure they function optimally. In this guide, we will cover everything you need to know about installing high bay LED lights.
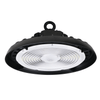
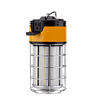
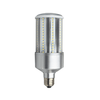
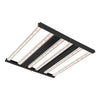
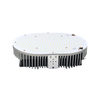
2. Understanding High Bay LED Lights
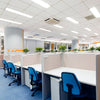
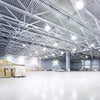
Before we dive into the installation process, let's take a moment to understand what high bay LED lights are and why they are a popular choice. High bay LED lights are energy-efficient lighting fixtures designed for spaces with high ceilings, typically 15 feet or higher. They provide bright and uniform illumination, making them ideal for large areas.
3. Safety Precautions
Safety Gear
Before starting the installation, it's essential to prioritize safety. Ensure you have the following safety gear:
- Safety goggles
- Gloves
- Ladder or scaffold (if necessary)
Turning off Power
To avoid electrical accidents, turn off the power source to the area where you'll be installing the lights. Safety should always be the top priority.
4. Choosing the Right Location
Selecting the right location for your high bay LED lights is crucial for optimal lighting performance. Consider the layout of your space and the specific areas that require illumination. Ensure that the chosen location is structurally sound and can support the weight of the fixtures.
5. Installing Mounting Hardware


Ceiling Mount
For ceiling mounting, follow these steps:
- Locate the ceiling joists or beams.
- Use appropriate anchors and screws to securely attach the mounting brackets to the ceiling.
- Ensure the brackets are level and evenly spaced.
Chain Mount

For chain mounting, follow these steps:
- Attach the mounting bracket to the fixture.
- Use chains and S-hooks to hang the fixture from the ceiling.
- Adjust the chain length to achieve the desired height.
6. Wiring the High Bay LED Lights
Power Source
Identify a suitable power source and ensure it matches the voltage requirements of your LED lights. If you're unsure, consult a professional electrician.
Wiring Connections
Follow the manufacturer's instructions to connect the wiring properly. Typically, you'll have black (hot), white (neutral), and green or bare (ground) wires. Secure connections with wire nuts and electrical tape.
7. Hanging the Fixtures
With the mounting hardware and wiring in place, it's time to hang the high bay LED fixtures. If you're working with a team, make sure to communicate effectively to ensure a safe and smooth installation.
8. Testing and Adjusting
After the fixtures are hung, turn the power back on and test the lights. Check for any flickering or issues with the illumination. Adjust the height and angle of the fixtures as needed to achieve the desired lighting effect.
9. Maintenance Tips
To prolong the life of your high bay LED lights, perform regular maintenance. Clean the fixtures and lenses, check for loose connections, and replace any malfunctioning bulbs promptly.
10. Energy Efficiency and Cost Savings
One of the significant advantages of high bay LED lights is their energy efficiency. They consume less electricity than traditional lighting sources, resulting in cost savings over time. Enjoy reduced energy bills while providing superior lighting.
11. Frequently Asked Questions (FAQs)
-
How do I determine the number of high bay LED lights needed for my space?
- The number of fixtures depends on factors like the area's size, ceiling height, and lighting requirements. Consult a lighting specialist for a detailed assessment.
-
Can I install high bay LED lights myself, or should I hire a professional?
- While it is possible to install them yourself, hiring a licensed electrician is recommended for safety and compliance with local regulations.
-
Do high bay LED lights require any special maintenance?
- Regular cleaning and occasional inspection of connections are typically sufficient. High bay LED lights are known for their low maintenance requirements.
-
What is the lifespan of high bay LED lights?
- High-quality LED fixtures can last up to 50,000 hours or more, depending on usage and maintenance.
-
Are high bay LED lights dimmable?
- Many high bay LED lights come with dimming capabilities, allowing you to adjust the brightness according to your needs.
12. Conclusion
Installing high bay LED lights can significantly improve the lighting quality and energy efficiency of your space. By following this step-by-step guide and adhering to safety precautions, you can enjoy the benefits of well-lit and cost-effective lighting. Make the switch to high bay LED lights today and experience the difference.


