

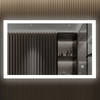

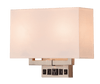
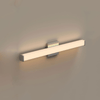


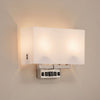


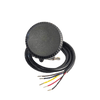


Our collection's LED Vanity Mirrors offer impressive features like inbuilt defogger and magnifying glass for enhanced functionality and ease of use. The LED-lit mirrors are suitable for installation in Bathroom Zones 2, 3, and non-bathroom/dry indoor areas.

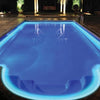
The image that follows depicts various bathroom zones for your reference:
- Zone 0: The inside of a bath or shower is zone 0. Any installation in this bathroom zone must be low voltage, (max 12V) and offer at least an IP67 rating for immersion-proof electrical fittings.
- Zone 1: Zone 1 is the area above the bath. It extends to a height of 2.25m from the floor. For a 240V installation, you'll have to use a 30mA residual current device (RCD) to protect the circuit in this zone. Also, an IP65 rating is mandatory for Zone 1 electrical fittings.
- Zone 2: The area stretching 0.6m outside the bath's perimeter and to a height of 2.25m from the floor comes under Zone 2. This bathroom zone needs at least an IP44 rating. It is better to consider the area around a washbasin (within a 60cm radius of any tap), as zone 2, to keep things on the safe side.
- Zone 3: Zone 3 is anywhere outside zones 0, 1, and 2 (subject to specific limits). It is a zone where the use of water jets is not likely. Zone 3 installations don't need to be compliant with standard IP ratings.
Albeit, if there is the possible use of the water jets in zones 1, 2, and 3, you must use a fitting that comes with a minimum rating of IP65.
NOTE: The installation process for all vanity mirrors from LEDMyplace is simple, fast, and almost the same. If you are well-versed with basic knowledge of electrical wiring, and practice of surface drilling, the installation will be easy. Nonetheless, if seeking a professional seems safer, go for it!
Given below is a list of items you'll need to perform a successful LED vanity mirror installation:
- Safety Glasses
- Drilling Machine
- Drill Bits
- Screw Drivers
- Wall Plugs
- Z mirror clips
- French Cleat Bracket
- Anchor Bolts
- Z mirror clips
- Spirit Level
- Measuring Tape
- Wire Terminal Plate
- Pencil (for marking)
Before going through the installation process, ensure:
- Inspecting the product as soon as you receive the delivery and make sure there is no damage.
- Handling the product with care, protecting sides, and edges of the glass against accidental damages.
- Having all the tools, you need to perform a successful installation.
- There are no hidden pipes or cables in the wall before drilling.
- If installing the mirror on drywall, make sure to drill in the center of the wall studs.
- If drilling holes in ceramic tiles, use a piece of masking tape on the tile to prevent the drill bit from slipping.
- Turning off the domestic electrical mains supply that will supply electrical current to your vanity mirror.
Installation Process:
Note: Ensure that all-electric work should follow the National Electrical Code (ANSI/NFPA)70.

- Hold the mirror before the mounting spot, and take a good look at its positioning. Also, Measure the distance between the gourd hole centers on the back of the mirror.

- Once you are happy with the spot you chose to install the LED vanity mirror, mark the drilling points.

- Use a spirit level to ensure that the drill points lie on a horizontal line.

- Drill holes on the markings.

- Insert the wall plugs with caution.


- Put the screws to the wall plugs. The screw head should protrude approximately 5mm (or more) from the hole.
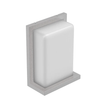
- Depending on the type of mirror you bought, it will offer French Cleat Bracket or z mirror clip style installation. Thus, you may have to screw the French Cleat Bracket and Z mirror clips on the wall.

- If your mirror offers French Cleat Bracket installation, ensure that it has a hanging cleat (bracket) on the back.

- Place the cleat on the wall bracket and secure the mirror in place.
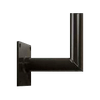
- If your mirror needs a Z mirror-style installation, place the gouts on the screws and hang it.

- Secure the Z mirror clips on the bottom sides of the mirror.

- Check whether or not the installation is secure.


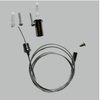
- Using a Wire Terminal Plate, Connect the power cord and hardwire to the power supply (junction box).
Checking The Mirror after Installation:
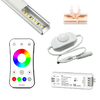
- Touch Switch (Changing the CCT and brightness)
- Touch the lit area of the one-touch switch to turn the LED light on or off.
- Press and hold the lit area of the touch switch to change the brightness of the light.
- To change the color appearance (Warm or Cool-white), tap the one-touch button, and stop when you get the desired light effect.
- Turn off the mirror, then turn it on. As the mirror comes with CCT Remembrance fear, the color appearance that you had set before should still be the same.
- Now, flat touch more than 80% area of the one-touch switch and increase its sensitivity.
- Mirror Defogger
- Once you connect the mirror to a power source, the defogger will work automatically. However, the anti-fog function will start working after 5 minutes of turning on the mirror.
After Care Instructions:
Always switch off the electrical supply at the mains during maintenance.
Cleaning & Maintenance:
- Turn off your LED Vanity Mirror and clean it with a soft, dry, non-abrasive cloth. Never use harsh chemical cleaning agents or abrasive material on any surface finish.
- Do not strike glass components with hard or pointed items. (such as a knife, eyelash curler, etc.)
- Do not place boiling or cold items against (or near) the glass surface. Wiping off all water spillages as soon as possible using a soft, damp cloth will help keep the mirror in a mint condition for years to come!

